- Published on
Quickly Connect Your Porkbun Domain to Netlify in 5 Minutes
- Authors

- Name
- irisjustdoit
- @irisjustdoit
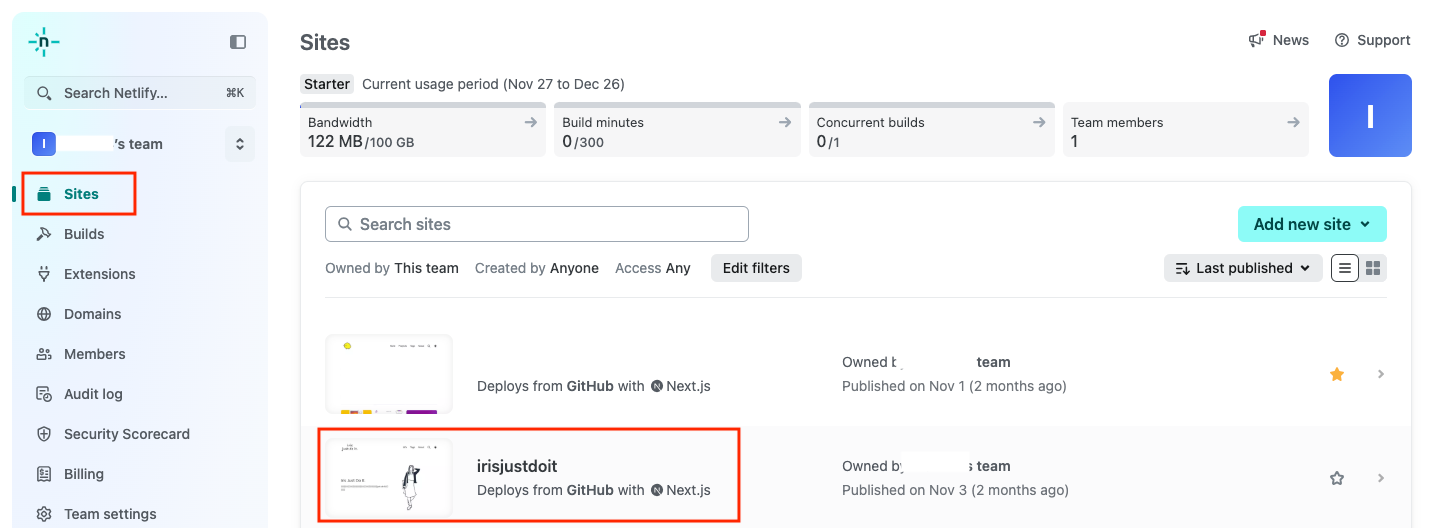
- Log in to Netlify and select the project for which you want to change the domain.
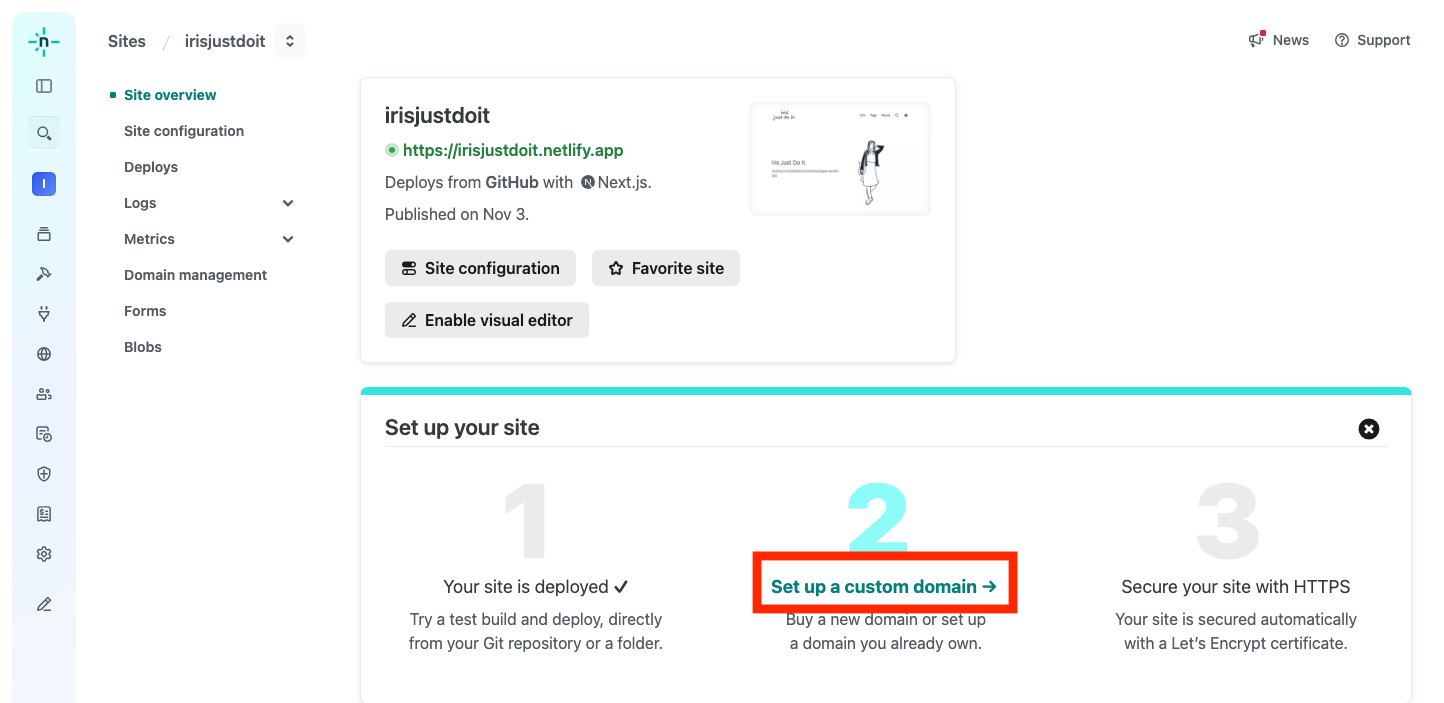
- Select "Set up custom domain."
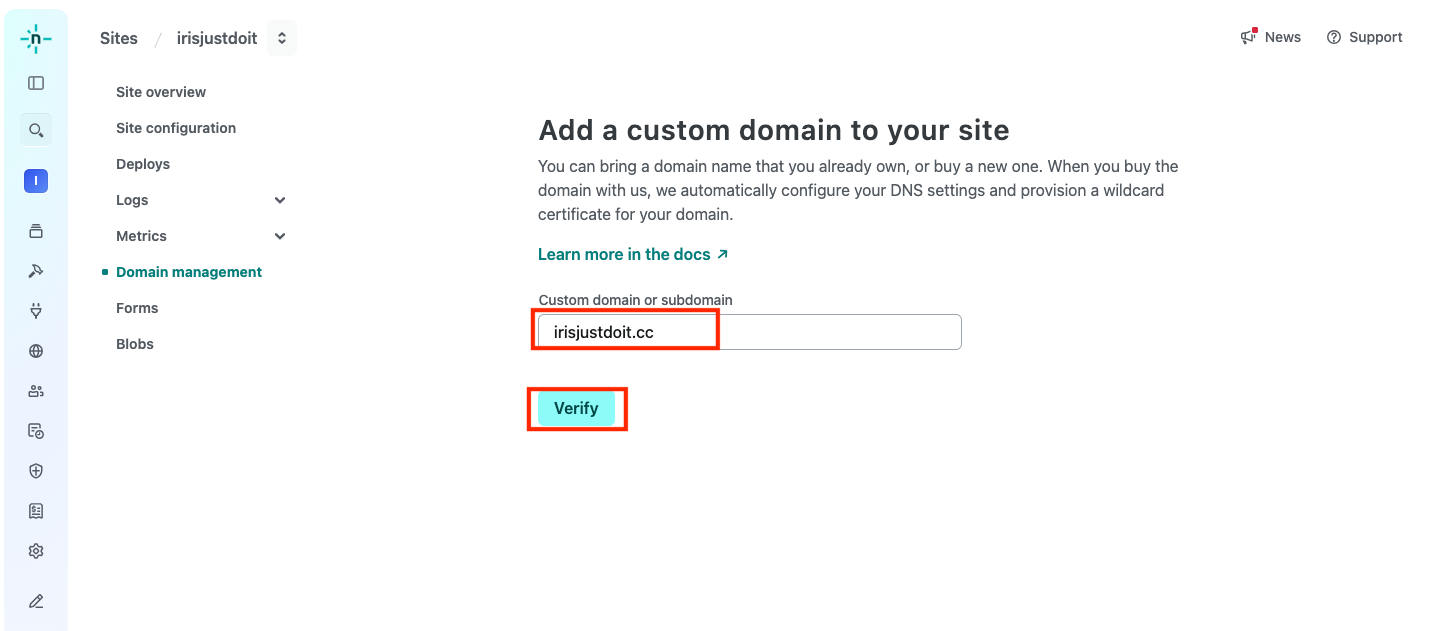
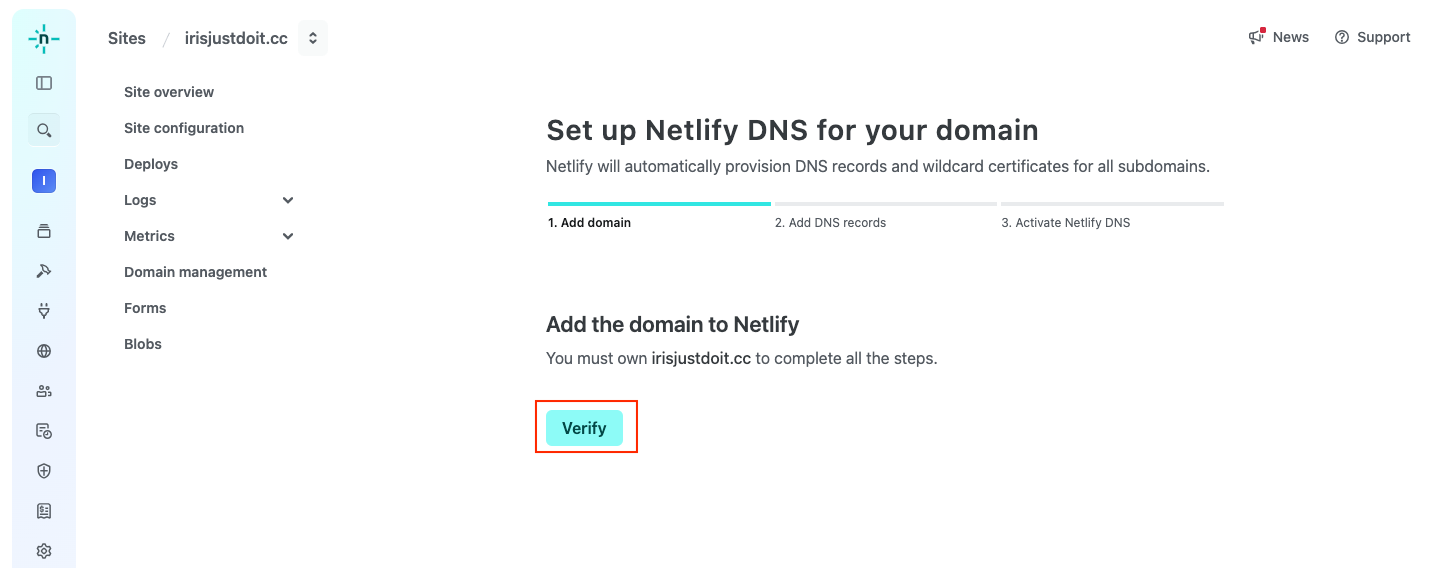
- Enter the purchased domain and click "Verify."
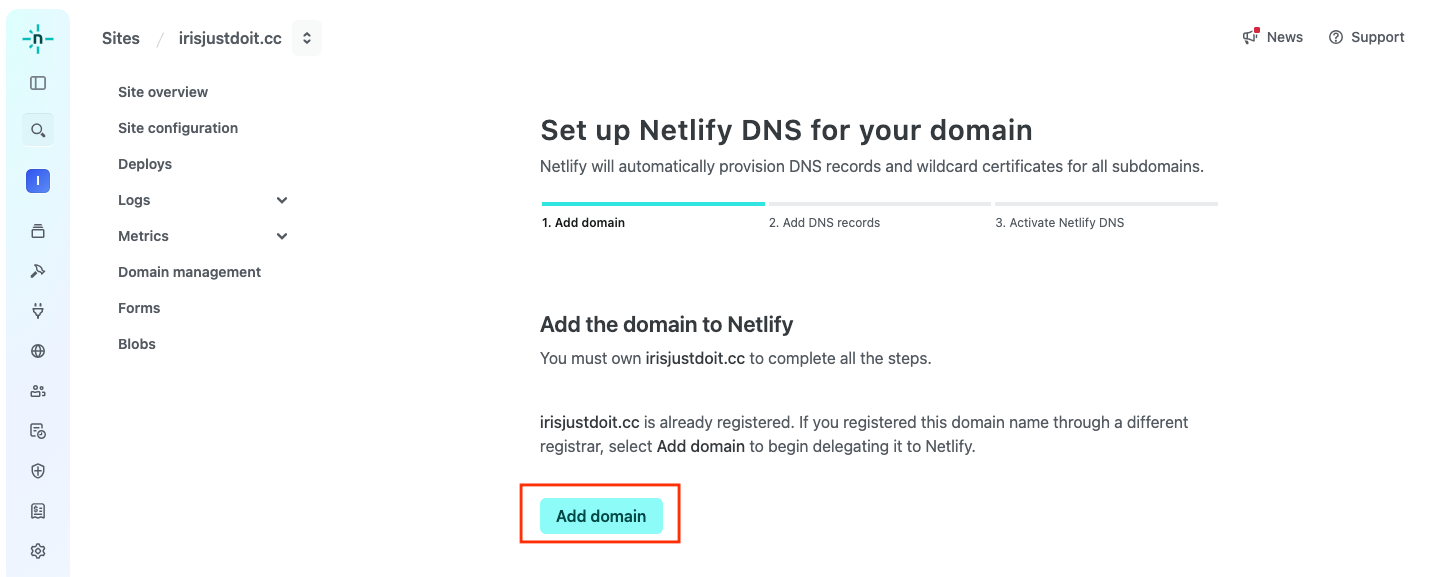
- Click "Add domain."

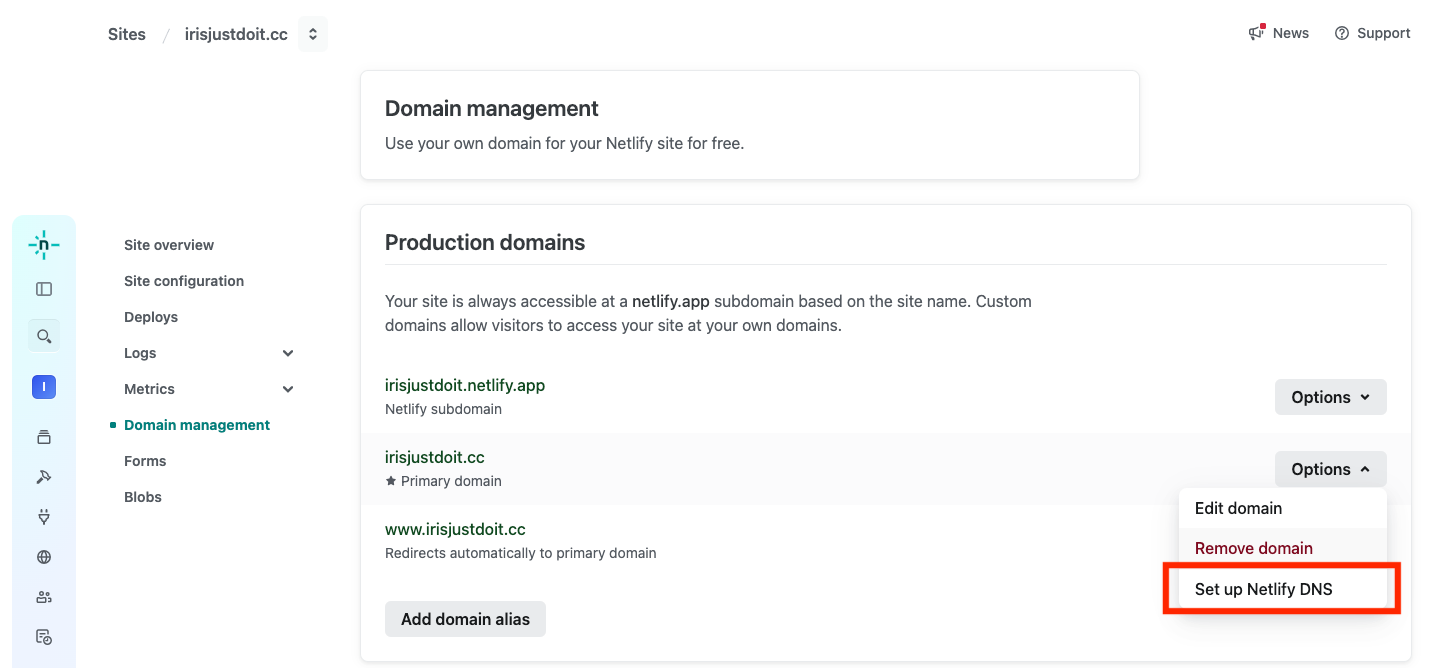
- Click "Set up Netlify DNS."
- Click "Verify."
- Click "Add domain" again.
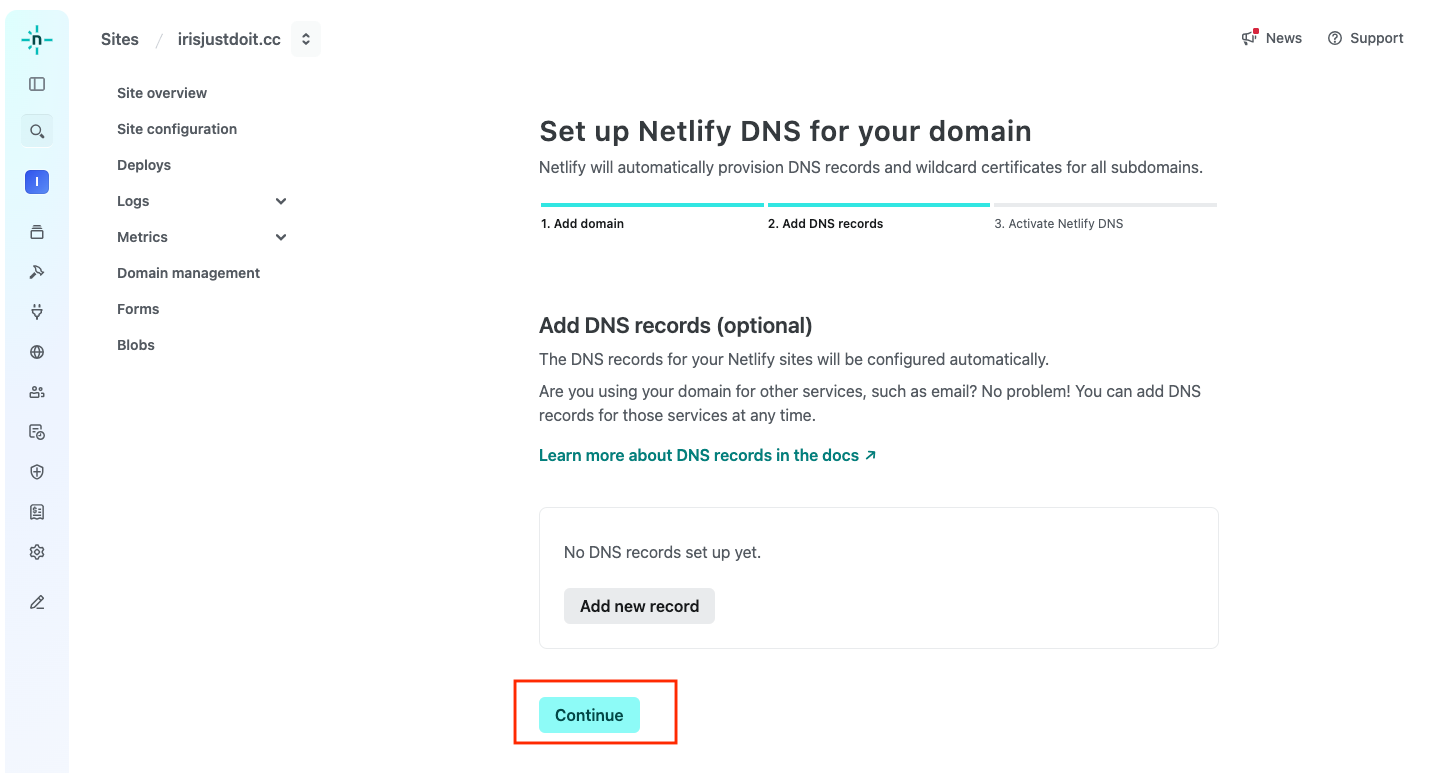
- Click "Continue."
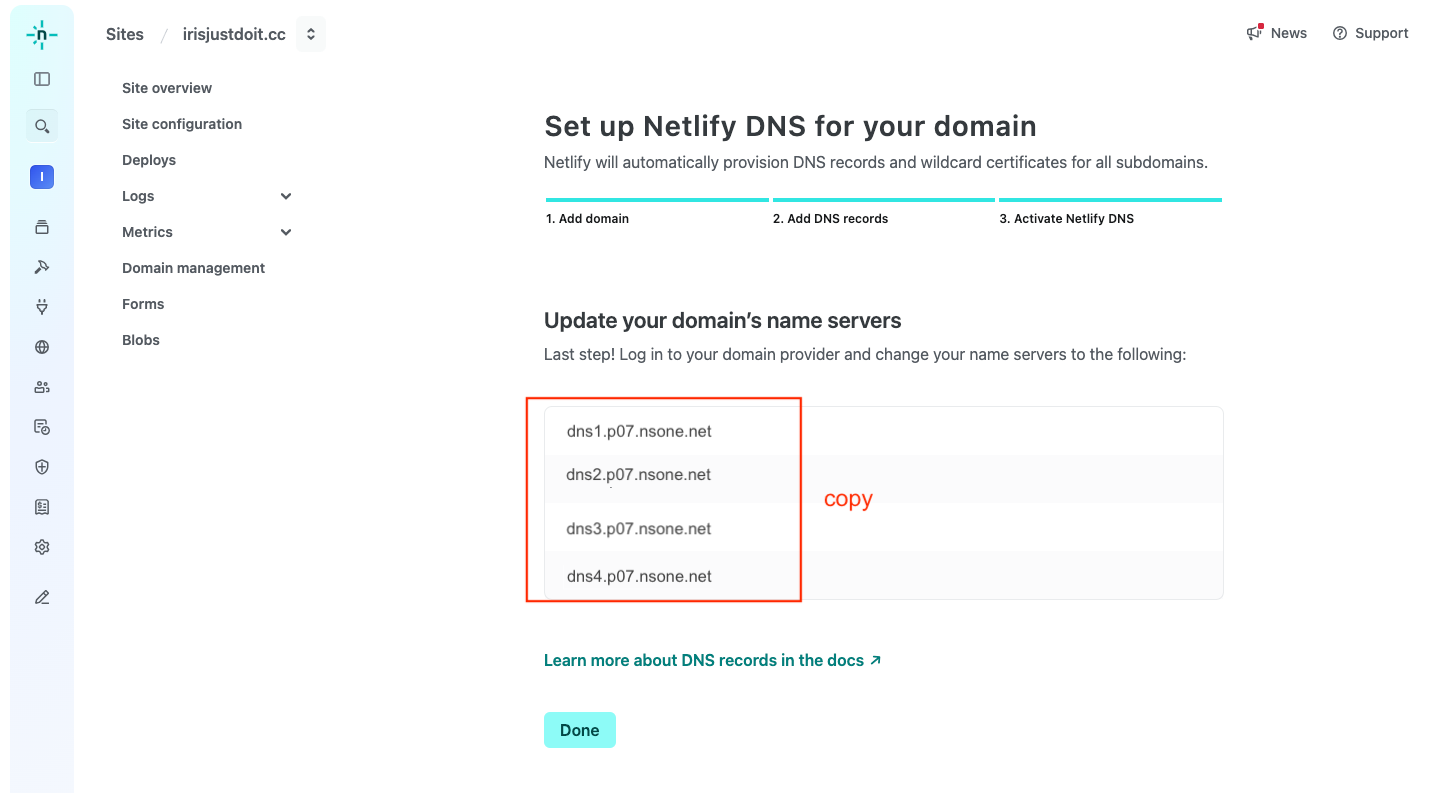
- Copy the four sets of name servers provided by Netlify.
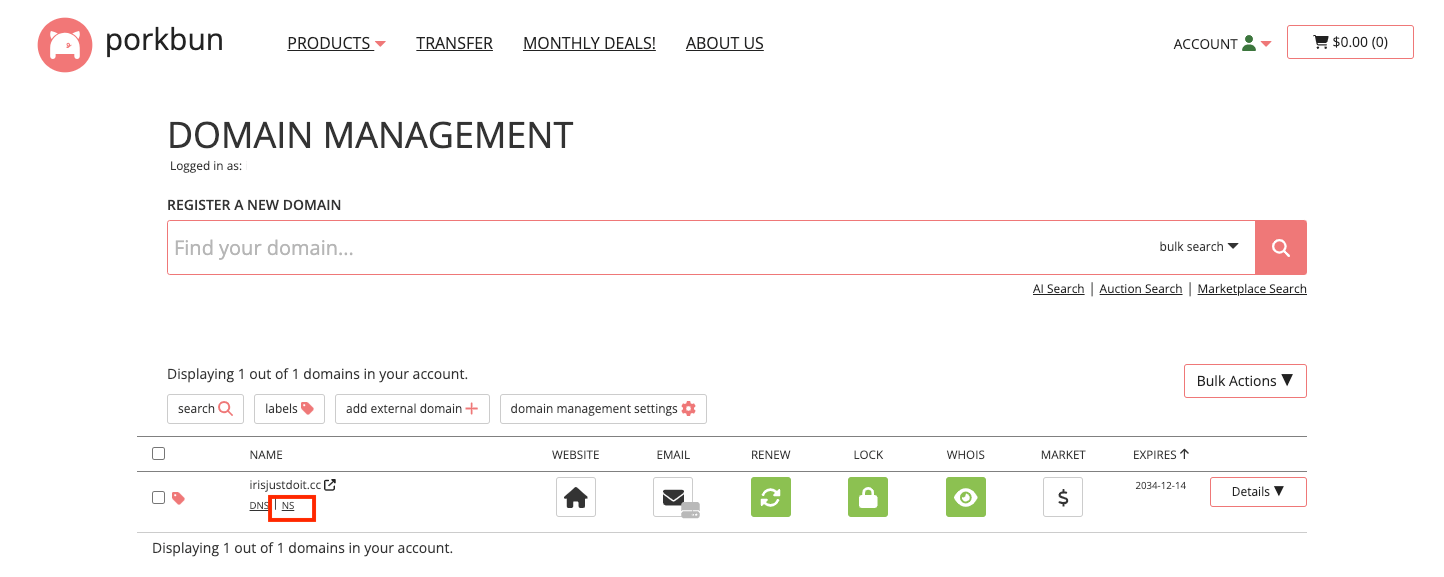
- Log in to Porkbun and click on "NS" displayed below the purchased domain.
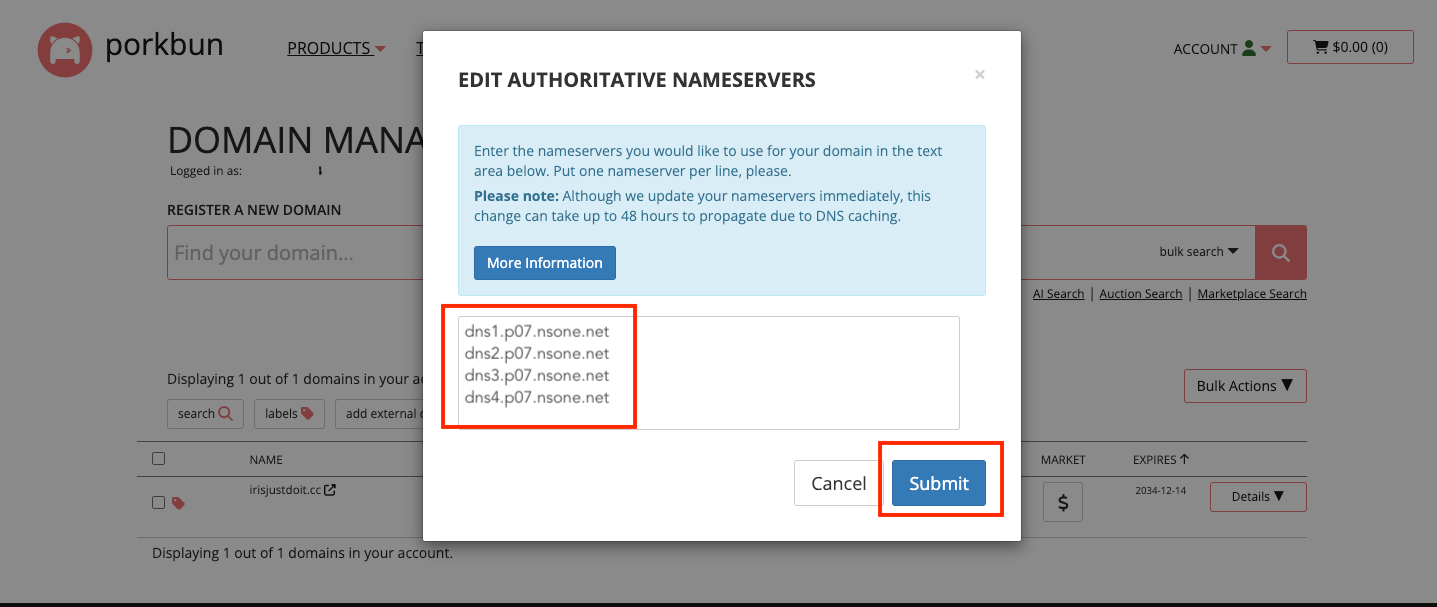
- Paste the copied four sets of DNS and submit.
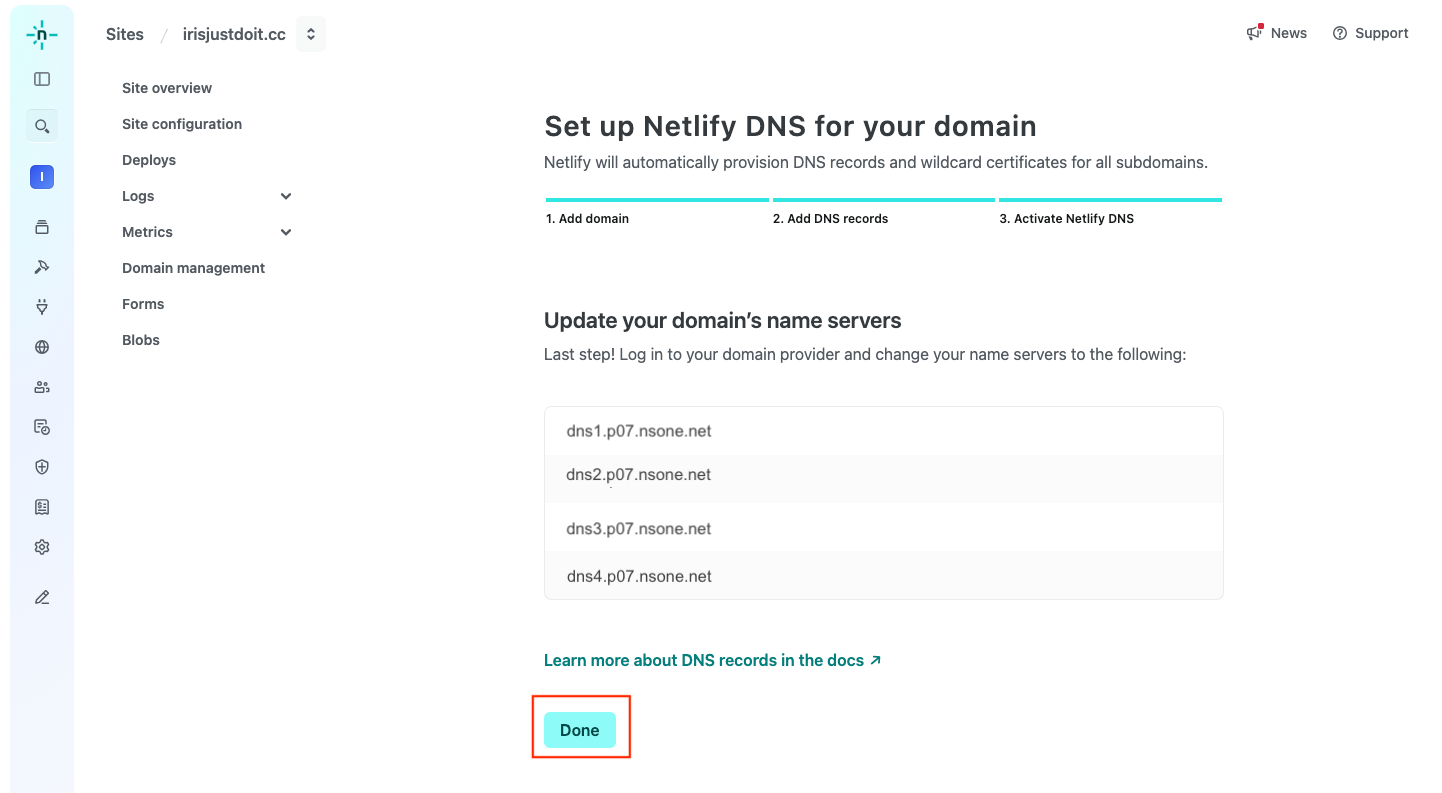
- Return to Netlify and click "Done."
- Setup is complete; click on your website name.
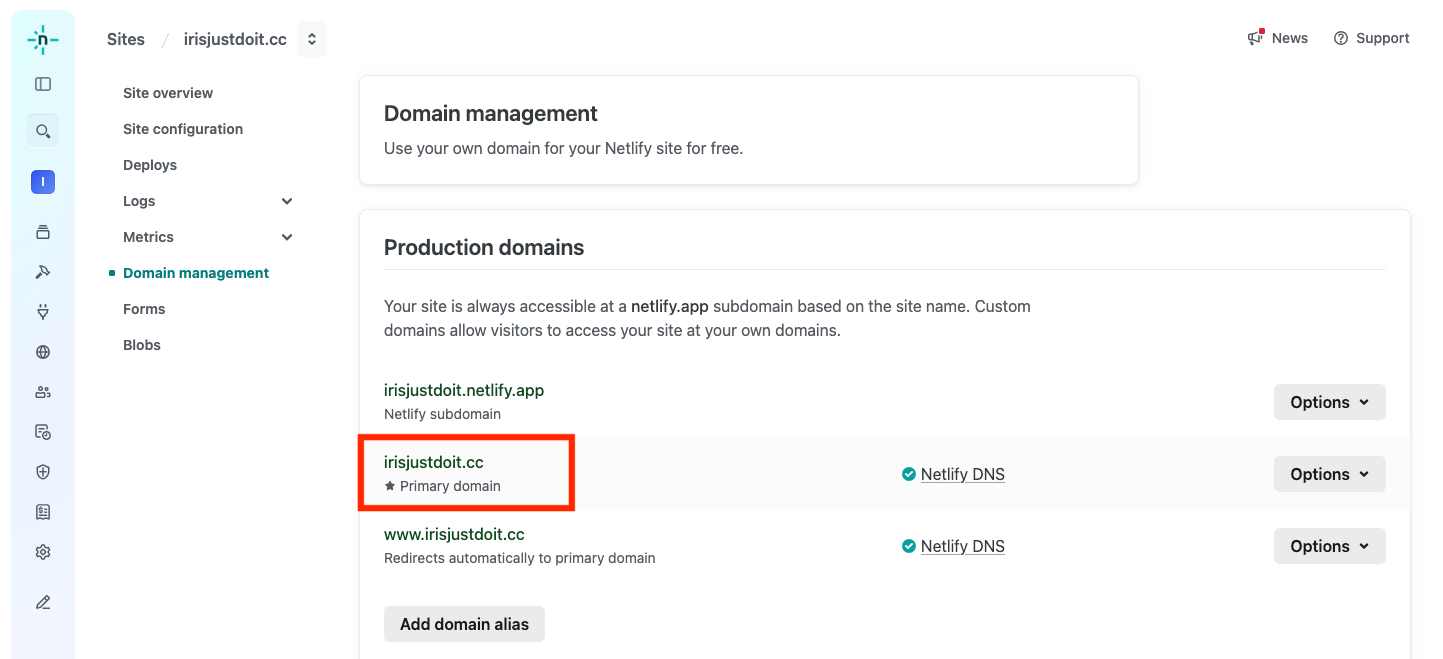
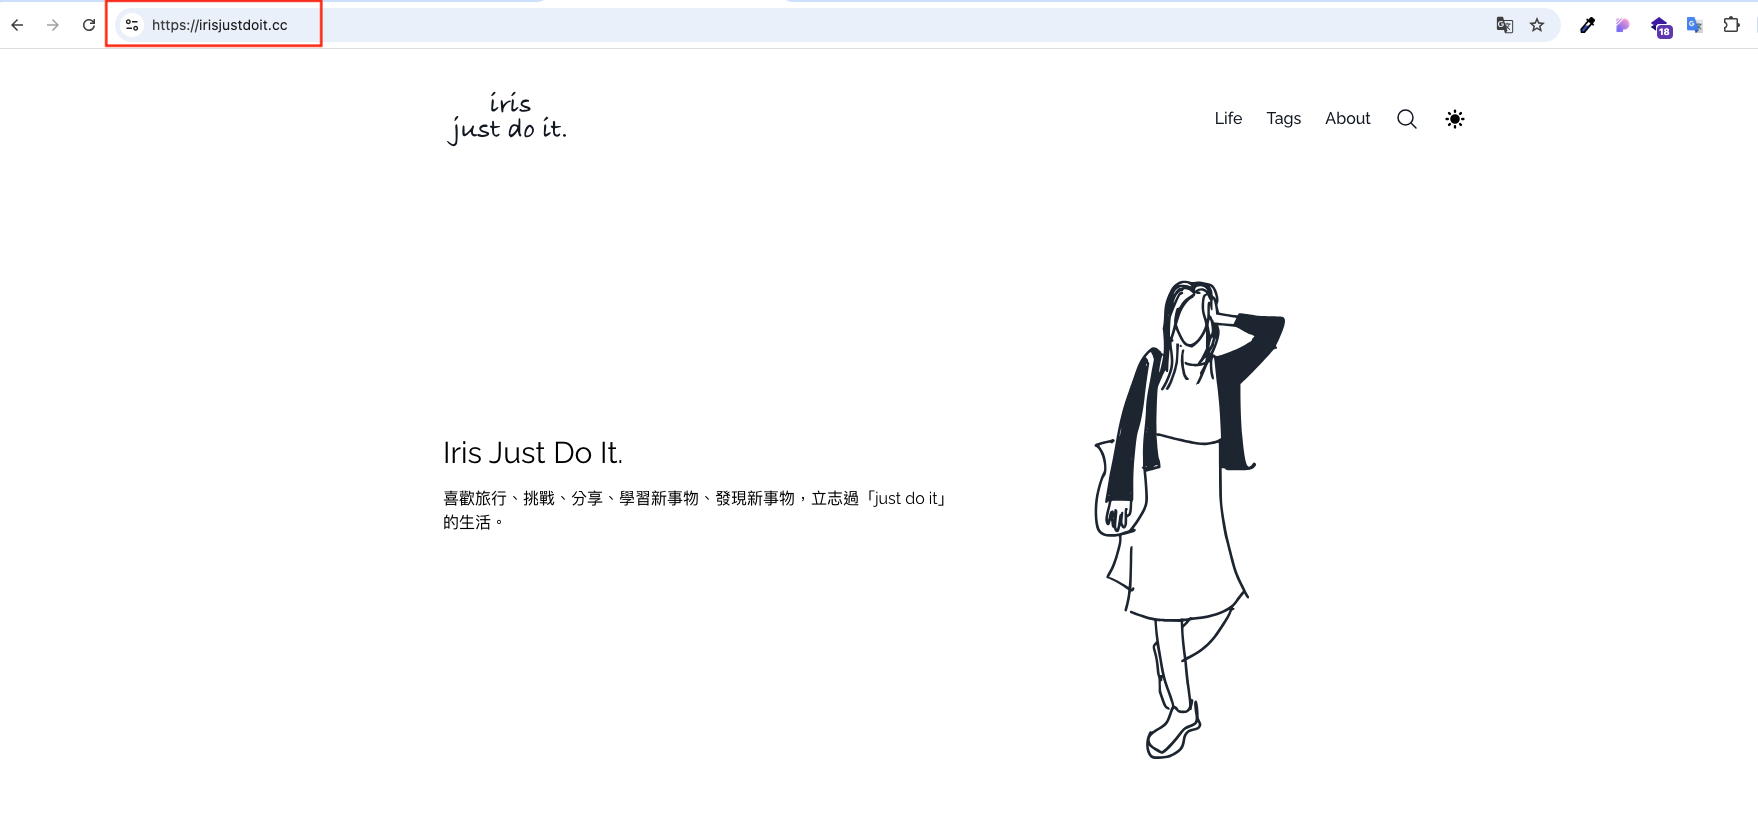
- You will see that the website has been updated to the new domain.
Congratulations on completing the setup! I hope this helps those in need!